How to make signs and labels
Follow this step-by-step guide to making signs and labels for your outdoor space with learners
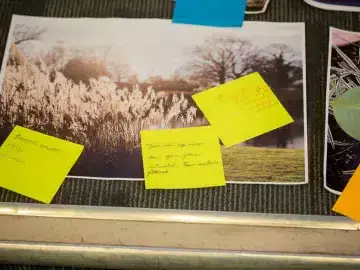
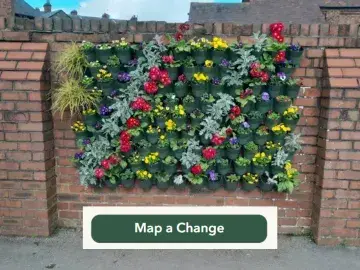
Design and make signs and labels to mark where improvements have been made, encourage others to look after them, and identify what plants are on your site. From supporting Early Years learners to practice writing letters, through to secondary learners choosing materials, designing and constructing – this guide provides a range of ways to get creative and communicate the positive changes they’ve been involved in.
Preparation
What you need
- paper
- a selection of pens, pencils or crayons for drawing designs
- chalk pens or permanent markers for writing on signs
- optional: acrylic paint and brushes
For EYFS-KS2:
- natural or recycled materials, such as large stones or pebbles for writing or painting on, lolly sticks, wooden spoons
For KS3 and above:
- off-cuts from planks, boarding or pallet wood
- sandpaper
- nails
- hammer
- wooden stakes or brush handles for mounting signs
Location
Indoors and outdoors
Useful guidance
Resources
Step by step
- Explore outdoors with learners to create a list of areas that require signs – are any areas homes for wildlife, or need looking after? What plants or seeds have been planted and need labels?
- Ask learners to choose a feature or plant they want to make a sign or label for.
- Invite learners to design the lettering for their chosen sign or label on paper. For younger learners, support them to write simple letterforms or words.
For KS3 and above - If creating signs from wood, prepare the wood by cutting it into suitable lengths and sizes. Older learners will then need to prepare the wood by smoothing any rough edges with sandpaper. Any sawdust will need to be brushed off before the wood can be drawn on.
- Learners can then use a pencil to copy their design onto the wood, to create a guide. Use chalk pens or permanent marker pens to complete the sign, adding colour to help it stand out or add decoration.
- Signs can then be mounted on a stake, by nailing through the front of the sign into the stake behind.
- To help learners, mark the wood on the front of the sign with pencil, by aligning the stake in the middle – this will act as a reference for placing the nails within this marked area. Small pieces of wood don’t need to be mounted on a stake – if used length ways they can be pushed directly into the soil.
- Using these guidelines and with support learners will use a hammer to gently tap 2-4 nails into the wood (the number of nails will be dependent on how big the sign is. For small signs of 10-20cm, two nails will be adequate. For larger signs use as many as needed to secure.) Still with support, place the sign on top of the stake and drive the nails through the sign and into the stake.
- Place the finished sign in its desired location, using a hammer if needed to knock signs into the ground. Signs can also be attached to fences or other structures where appropriate.
For KS2 and below - Support learners to copy their letters onto their sign or label. You may wish to have a selection of materials to choose from – pebbles or stones, lolly sticks or wooden spoons work well.
- Once written (and decorated if they wish) – support learners to place their signs in the right place outdoors. Pebbles or stones can be simply laid down next to the corresponding plants, while lolly sticks or wooden spoons can be stuck into the ground.
This activity has been adapted from RHS Campaign for School Gardening
Curriculum links
This activity can be used to support curriculum knowledge and skill development in expressive arts and design, literacy and design and technology, alongside enhancing nature education with age-appropriate adaptations.
What to try next
Making zines for nature
Begin activityEmotional responses to nature
Begin activity
Tracking changes on your site
Begin activityThumbnail image: © RHS, Credit: RHS / Edward Shaw