Mapping ground without plants

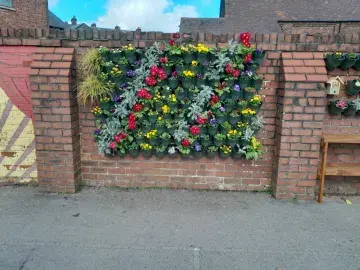
Much of your site will be covered by playgrounds, paths, a car park, or bare earth – ground that doesn’t have any plants (or only a few). Some will be made of natural materials like pebbles and soil, and a lot will be non-natural like tarmac and asphalt. These spaces are important for the daily use of the school site but can also offer resources for nature and can be enhanced to bring greenery and life into currently grey spaces.

Mapping your ground without plants is part of the Mapping your site activities, enabling you to explore and map the habitats your site currently offers for nature. Understanding your starting point is really important and will allow you to measure any nature gains you achieve when you start making enhancements to your site. Mapping areas of ground without plants is one of eight habitat mapping sessions in this unit of learning.    

Before you start mapping, the introductory activities have been designed to support learners in identifying the properties of different ground materials, allowing them to answer the questions in the Ground Without Plants Flowchart accurately.  

Getting to know your space

~ 1 hour
KS2
KS3

Preparation

Green skills

  • Identification and ecology
  • Recording data
  • Interpreting data 

What you need

  • The Habitat Mapper app on one mobile device (for educator use)
  • Ground without plants activity sheets (Worksheet, Flowchart and Activity Guide)
  • Clipboards
  • Drawing materials
  • 4 x 500ml containers of water for each area you test.
  • A stopwatch

Location

  • Outdoors 

Useful guidance

Step by step

  1. Ask learners to work in small groups (four works well) and find an area of ground that doesn’t have plants on it.
  2. Using the Ground Without Plants Worksheet, ask learners to work through the four activities. First, they check that the ground is in fact bare by taking seven steps and trying not to stand on a plant. If they can do this, the ground is considered bare.
  3. Then they pour water on to the ground to investigate its permeability. Each group will need to use three 500ml bottles of water for each area they check. Pour one 500ml bottle of water onto an area the size of a pencil case and watch for one minute to see if it soaks in. Repeat up to two more times. If the water soaks in the ground is permeable; if not it is impermeable.  
  4. In the third activity, learners examine the ground to determine if it is made from a natural or non-natural material.
  5. The last activity is only required if the ground is impermeable and made from a natural material. Learners pour a fourth 500ml bottle of water onto the ground and rub the ground hard with a finger. This determines if the ground is bare soil or rock.  
  6. After completing these activities, learners should use the Ground Without Plants Habitat Flowchart to decide which habitat they have. Educators should then work with learners to add this to your school map using the Habitat Mapper app.
  7. Repeat this for each separate area of ground without plants on your site, until you have mapped them all.
  8. Return to the Mapping your site page and select the next habitat category you have on site.

Reflection

The material the ground is made from, and whether water can soak through, has a big effect on how likely the area is to flood, and also how friendly it is to nature. Invite learners to think about two scenarios – a) a grass playing field being covered with tarmac, and b) a tarmac car park being changed to gravel. What would happen in a heavy rainstorm? Have the changes made the area better or worse for nature? And for people? Why?