Mapping your site
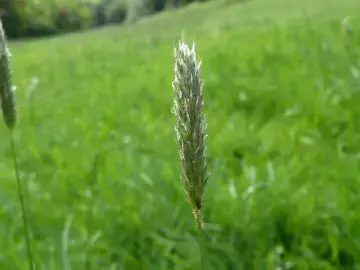
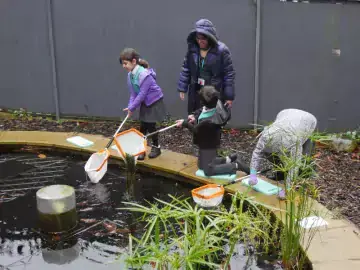
In this activity you will map the habitats on your learning site, such as grass, trees, ponds, flowerbeds and playgrounds.
This first map you create will enable you to measure and track the gains you achieve for nature as you progress through the Nature Park programme, and means that you and your learners will be collaborating with the Natural History Museum on groundbreaking research into nature recovery.
Whether your site is buzzing with life or a little greyer than you would like, understanding your starting point is an important first step in your Nature Park journey.
We have recently improved the Habitat Mapper tool so you can access it from a browser. If you started habitat mapping using the Field Maps app, you can continue using the app (by clicking here) or use the browser - whichever you prefer.
1. Plan your sessions
The Prepare for mapping your site page includes planning tools to help you decide which habitats to map and when, and an introduction to the Habitat Mapper tool that will enable you to draw your habitats on to the Nature park map, so head there first.
2. Outdoors: Identify the habitats on your site
There are eight activities to choose from, each focusing on a different habitat type (see below).
For each habitat type, a set of outdoor activities develop learners’ understanding of key concepts. Then a flowchart enables learners to identify that habitat. You can draw these onto a printed map outdoors, or if you have internet connectivity outdoors, draw them directly on to the Nature Park map (see below).
Not all habitats may be present on your site, so you can pick and choose. You can spread these activities out throughout the year if you wish, or plan a focused day or week of habitat mapping activities.
- It's best to map playgrounds, pathways, carparks etc first (Ground without plants), and areas of grass and playing field (Grass and wildflowers) as these are likely to cover the largest areas of your site.
- Then move on to mapping trees, hedges and bushes, flowers and food, and water habitats.
- Finally, add in fences and walls (vertical features), and small features like bird boxes, bee hotels and log piles (microhabitats).
Working in this order will help you to build up your map over time.
3. Add each patch of habitat to the Nature Park map
Outdoors if you have mobile devices with internet connectivity, or back in the classroom if not, learners and educators work together to draw each patch of habitat onto the online Nature Park. This done using the online Habitat Mapper tool. This works well as a front of classroom activity with each group going up one at a time, or as a rotational activity alongside other tasks.
Open Habitat Mapper tool
To access the tool, you must be logged into the Nature Park website and click through to the Habitat Mapper from here. If asked to log in again, don't type in any log in credentials, just click the big blue button. Check the troubleshooting advice if you need help.
4. Repeat for each of the eight habitat categories
You only need to do the ones relevant to your site.
Once you've worked your way through all the habitat categories, you will have created the first habitat map of your site - the starting point in your Nature Park journey towards boosting biodiversity.
By this point, you will have developed a baseline understanding of what your site offers for nature and for yourselves. You will also have contributed exciting new data to a national nature recovery research project with the Natural History Museum, so thank you for being amazing research collaborators!
Eight habitats to choose from:

Habitats: Mapping ground without plants
Begin activity
Mapping grass and wildflower habitats
Begin activity
Mapping tree habitats
Begin activity
Habitats: Mapping hedges and bushes
Begin activity
Habitats: Mapping flowers and food
Begin activity
Mapping water habitats
Begin activity
Habitats: Mapping vertical features
Begin activity
Mapping microhabitats
Begin activity
Review and celebrate success
You’ve put in a lot of work to explore and understand your site and create your first map – an incredibly important part of the Nature Park programme. It’s time to celebrate your achievements and reflect on what you’ve learned about your site.
Hold an assembly or classroom presentation to reflect on your achievement. Learners can:
* Present your map to others, describing the habitats that have been identified and the contribution that different classes or groups have made
* Discuss what has been learnt about your site through the process
* Have a moment of celebration with a 'thank you' to all the different people that helped along the way and a cheer or a round of applause
* Discuss why the process has been important and what happens next
Your baseline habitat map represents your starting point. From here, with your learners you can decide what kinds of improvements you'd like to make - perhaps turning a grey area to greenery, letting some grass grow long, planting flowering grassland plants or installing a pond or rain garden. Or maybe you have other ideas?
If you make a change to your site, add it to the Nature Park map using the Mapping Change tool (not the Habitat Mapper tool).
Mapping changes to your site
Once your first habitat map is complete, you can further study nature using surveys like the Pollinator Count.
Curriculum links
This is a community science activity that contributes directly to real scientific research for the Nature Park. Taking park in the activity can aid development of working scientifically, geography fieldwork and citizenship skills alongside consolidating science curriculum knowledge and enhancing nature education.